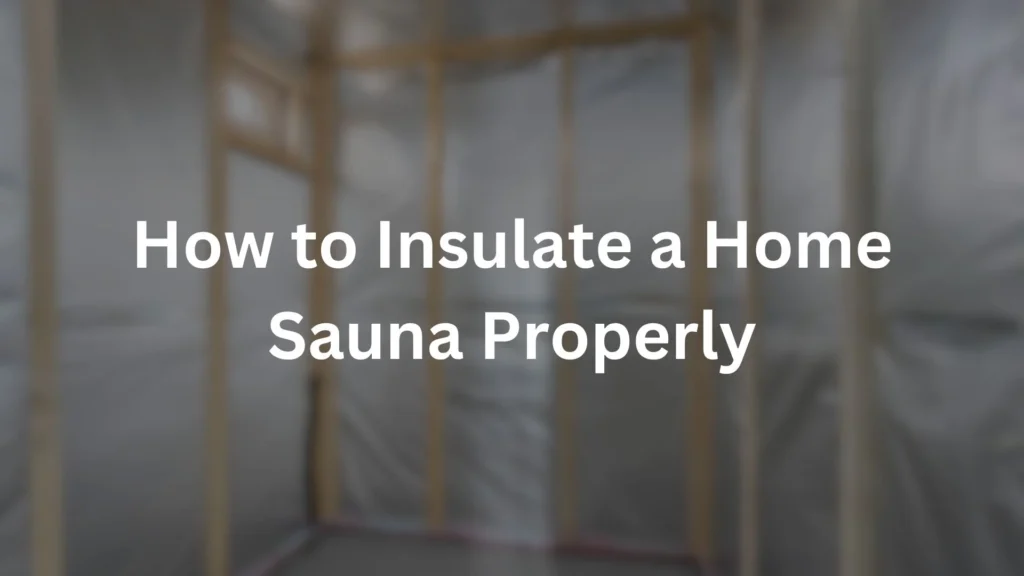
Insulating a home sauna properly affects everything about how it performs, how quickly it heats up, how well it holds temperature, and how comfortable it feels to use. Whether you’re building a sauna as part of a garden cabin, converting a spare room, or fitting out a purpose-built structure, the same core principles apply across walls, roof, and floor, though each area has its own specific considerations. This guide covers what’s involved in insulating a home sauna properly, area by area.
At Fife Premier Handyman Services, insulation is one of the key stages we get right as part of horsebox sauna conversions across Fife, and the same principles covered here apply whether you’re insulating a horsebox, a garden cabin, or another type of home sauna build.
If you’re thinking about a sauna of your own, see our garden sauna builds in Fife.
Understanding the Two Layers: Insulation and Vapour Barrier
Before looking at specific areas, it’s worth being clear on a distinction that matters throughout the whole build: insulation and the vapour barrier are two separate elements doing two different jobs.
| Element | Job It Does | Where It Sits |
| Insulation | Slows heat loss through walls, roof, and floor | Between the outer structure and the vapour barrier |
| Vapour barrier | Stops moisture from sauna steam getting into the structure | Between the insulation and the interior cladding, facing into the sauna |
The vapour barrier, typically a heat-resistant foil layer, needs to sit on the warm side of the insulation, facing the interior of the sauna. Getting this order wrong, or skipping the vapour barrier altogether, is one of the most common causes of moisture damage in home sauna builds, since trapped moisture behind the insulation leads to mould and rot over time.
Comparing Insulation Materials
Here’s how the main insulation options compare for use in a home sauna environment.
| Material | Heat Performance | Moisture Handling | Cost | Ease of Installation |
| Mineral wool (rock/stone wool) | Excellent, handles high heat well | Good, doesn’t degrade with occasional moisture | Moderate | Straightforward to cut and fit |
| Foil-faced foam board | Very good, high performance per thickness | Can trap moisture if not sealed properly | Moderate to higher | Requires precise cutting |
| Sheep’s wool/natural fibre | Good, slightly lower heat tolerance | Naturally moisture-regulating | Higher | Easy to handle |
| Standard fibreglass insulation | Adequate, not ideal for sustained heat | Can degrade with moisture over time | Lower | Easy to fit, but not sauna-appropriate |
Mineral wool is the most commonly recommended choice for home sauna builds generally, offering a solid balance of heat performance, cost, and practical ease of installation. It’s worth avoiding standard fibreglass loft insulation, since it isn’t designed for sustained sauna temperatures and can degrade or potentially off-gas under prolonged heat exposure.
Insulating the Walls
Wall insulation is usually the most straightforward area to work with, since walls are typically flat and accessible during construction. Fit insulation snugly between wall studs or framing members, avoiding gaps that create cold spots. Don’t compress the insulation to force it into a space, since compression reduces its insulating effectiveness. Fit the vapour barrier over the insulation, sealing joints and edges carefully, before the interior cladding goes on top. Pay particular attention to corners and joints, where gaps are most likely to be accidentally left.
For most home saunas, wall insulation in the region of 50 to 75mm of mineral wool or equivalent offers a reasonable balance of heat retention and space efficiency, though thicker insulation can be used where space allows and colder conditions are expected.
Insulating the Roof
Roof insulation deserves particular attention, since heat rises and escapes fastest through a poorly insulated ceiling, making this one of the most important areas to get right. Use a slightly thicker insulation layer than the walls, typically in the region of 75 to 100mm, given how much heat loss occurs through an under-insulated roof. Ensure the vapour barrier is properly sealed across the entire roof area, since this is often a harder area to access for maintenance later if problems develop. Check for any existing roof leaks or damp issues before insulating, since trapped moisture behind insulation in a roof is particularly difficult and costly to identify and fix once cladding is in place.
Getting the roof insulation right has a disproportionate effect on how efficiently the sauna heats and holds temperature, so it’s worth not skimping on this area even if you’re trying to manage costs elsewhere.
Insulating the Floor
Floor insulation is sometimes overlooked, but it makes a genuine difference to comfort and heat retention, particularly in colder climates or for saunas used through winter. Fit insulation between floor joists if the sauna has a suspended timber floor, following the same principles as wall insulation. Use moisture-resistant insulation specifically suited to floor applications, since floors are more exposed to standing water and general moisture from sauna use. Consider a floor covering that complements the insulation, such as slatted timber decking that allows some airflow and drainage while still providing insulating benefit underfoot.
Floor insulation is often around 50mm of mineral wool or an equivalent moisture-resistant material, though this can vary depending on the specific floor construction and how the sauna sits relative to the ground.
Thickness Guidance by Area
| Area | General Thickness Guidance |
| Walls | 50-75mm |
| Roof | 75-100mm |
| Floor | Around 50mm |
These figures are general starting points rather than fixed rules, and the ideal thickness for your specific build depends on the existing structure, local climate, and how much space you’re able to dedicate to insulation without compromising interior room.
Insulating Around Doors and Windows
Doors and windows represent natural weak points in any sauna’s thermal envelope, and it’s worth giving them specific attention alongside the main wall, roof, and floor insulation. Around a sauna door frame, gaps left during framing can allow a surprising amount of heat to escape if not properly filled and sealed, so it’s worth checking this area carefully once the frame is in place and before cladding covers it up. A properly fitted sauna door with a quality seal around its edges makes a genuine difference to heat retention, since even a well-insulated sauna loses much of that benefit if warm air is constantly escaping around a poorly sealed door.
Windows need similar attention, particularly around the frame where it meets the surrounding insulation and vapour barrier. Any gap here is both a thermal weak point and a potential entry point for moisture if not sealed correctly, so it’s worth treating window installation as part of the same careful sequencing as the rest of the insulation and vapour barrier work, rather than as a separate task tackled independently once the main insulation is finished.
Insulating Around the Heater Area
The area immediately surrounding the heater, whether electric or wood-fired, needs particular care when it comes to insulation and clearances, since this is where heat output is most concentrated and where manufacturer safety clearances become critical. Insulation directly behind or near a heater often needs additional non-combustible protection, separate from the general wall insulation used elsewhere in the sauna, to safely manage the higher heat concentration in this specific area. This is an area where checking the heater manufacturer’s specific installation guidance matters more than following general insulation principles alone, since clearance and protection requirements can vary between different heater models and types.
For a wood-burning stove specifically, the area around the flue penetration through the roof or wall also needs careful, non-combustible detailing, separate from the standard insulation approach used across the rest of that surface. This is a genuine safety consideration rather than simply a performance one, so it’s worth taking extra care and following manufacturer instructions precisely in this specific zone of the build.
Dealing with Awkward Shapes and Structural Features
Real-world sauna builds rarely consist of perfectly flat, uninterrupted surfaces, and awkward shapes, whether that’s a curved roof section, an intruding structural beam, or an irregular corner, need extra care when insulating to avoid leaving unintentional gaps. Cutting insulation to fit these areas precisely takes more time and patience than insulating a straightforward flat wall section, but rushing this part of the job is one of the more common ways cold spots end up in an otherwise well-insulated build. Taking the time to properly template awkward areas before cutting insulation to size, rather than cutting roughly and hoping for a reasonable fit, pays off in a more consistently insulated finished structure.
For horsebox conversions specifically, wheel arches are a particularly common awkward feature that needs this kind of careful attention, since their curved shape doesn’t lend itself to simple rectangular insulation panels in the way a flat wall section does.
Checking Insulation Performance Once Installed
Once insulation and the vapour barrier are fitted but before cladding goes on top, it’s worth doing a final visual check across the whole structure to confirm there are no visible gaps, compressed sections, or areas where the vapour barrier hasn’t been properly sealed. This is genuinely your last easy opportunity to catch and fix any issues before they become hidden behind the interior cladding, since problems discovered after the sauna is fully built and in use are considerably more disruptive and costly to address. A simple, methodical walk around the entire interior, checking each wall section, the roof, and the floor in turn, takes relatively little time but can save significant hassle later if it catches a problem while it’s still easy to fix.
How Climate and Location Affect Insulation Needs
While the general thickness guidance covered earlier in this guide works well for most UK conditions, it’s worth adjusting your approach slightly if your sauna will be sited somewhere with particularly harsh local conditions, whether that’s an exposed, windy location or an area that experiences notably colder winters than the UK average. A sauna sited in a more sheltered spot, perhaps against a house wall or within a walled garden, may perform adequately with insulation toward the lower end of the general guidance ranges, while one sited in a genuinely exposed, wind-battered location might benefit from insulation toward the thicker end, or even slightly beyond, to compensate for the additional heat loss caused by constant wind exposure against the exterior.
This isn’t something that needs to be calculated with great precision for most home sauna builds, but it’s worth factoring your specific site conditions into your decision rather than applying general guidance uniformly regardless of where the sauna will actually sit.
Balancing Insulation Thickness Against Interior Space
For smaller sauna builds, particularly horsebox conversions where every centimetre of internal width matters, it’s worth being mindful that thicker insulation directly reduces usable interior floor space, since insulation, vapour barrier, and interior cladding all add up on each wall. In a genuinely tight horsebox interior, choosing a higher-performance insulation material like foil-faced foam board, which achieves strong thermal performance in a thinner overall build-up compared to mineral wool, can be a sensible way to balance heat performance against preserving as much usable interior space as possible.
This trade-off is less relevant for larger builds with plenty of spare width to work with, where the marginal loss of a few extra centimetres to thicker mineral wool insulation makes little practical difference to comfort or usability. Weighing this up properly for your specific build, rather than defaulting to the same insulation thickness and material regardless of available space, helps ensure the finished sauna feels as spacious and comfortable as your starting dimensions genuinely allow.
Common Mistakes When Insulating a Home Sauna
Skipping or improperly sealing the vapour barrier, leading to moisture problems regardless of insulation quality. Using standard building insulation instead of sauna-appropriate materials, risking degradation or off-gassing under sustained heat. Leaving gaps around framing, corners, and awkward areas, creating cold spots that reduce overall efficiency. Under-insulating the roof specifically, where heat loss tends to be greatest. Ignoring floor insulation entirely, missing out on a meaningful comfort and efficiency improvement, particularly in colder months. And compressing insulation to fit a tight space, which reduces its effectiveness rather than solving the space problem.
Why Getting Insulation Right Affects Everything Downstream
Insulation quality has knock-on effects well beyond just comfort. A well-insulated sauna heats faster, holds temperature more efficiently, and costs less to run over time, regardless of whether you’re using an electric or wood-fired heater. Poor insulation means the heater has to work harder and longer to reach and maintain temperature, increasing running costs and potentially shortening the heater’s working life through more frequent, sustained use.
Should You Get Professional Help With Insulation?
Insulation might seem like one of the simpler stages of a sauna build compared to cladding or bench construction, but getting the material choice, thickness, and vapour barrier sequencing right has long-term consequences that are difficult and expensive to fix once cladding is fitted over the top. If you’re not confident choosing between materials or fitting them properly around framing, corners, and awkward areas, this is a stage worth getting a second opinion on before proceeding.
This is exactly the kind of guidance Fife Premier Handyman Services provides as part of horsebox sauna conversions, helping choose the right insulation materials and thickness for the specific build, and making sure everything is fitted correctly alongside the vapour barrier before cladding goes on top, whether that’s a horsebox conversion or another type of home sauna project.
Frequently Asked Questions
What’s the best insulation for a home sauna?
Mineral wool is the most commonly recommended choice, offering a good balance of heat performance, moisture handling, and cost, though sheep’s wool and foil-faced foam board are also solid alternatives depending on priorities.
Do I need a vapour barrier as well as insulation?
Yes, the vapour barrier and insulation serve different purposes, the barrier stops moisture reaching the insulation and structure, while the insulation slows heat loss, and both are essential for a properly performing sauna.
How thick should sauna insulation be?
Roughly 50 to 75mm for walls, 75 to 100mm for the roof, and around 50mm for the floor is a reasonable general guide, though exact requirements depend on your specific structure and climate.
Is floor insulation really necessary for a home sauna?
Yes, it makes a genuine difference to comfort and overall heat retention, particularly for saunas used through colder months, even though it’s sometimes overlooked compared to wall and roof insulation.
Can I use standard loft insulation in a home sauna?
It’s not recommended, since standard fibreglass insulation isn’t designed for sustained high sauna temperatures and can degrade or potentially off-gas, unlike sauna-appropriate materials such as mineral wool.
What happens if the vapour barrier isn’t sealed properly?
Moisture from sauna steam can get past it and into the insulation and structure behind, leading to mould, rot, and reduced insulation performance over time.
Final Thoughts
Insulating a home sauna properly comes down to getting three things right: choosing a sauna-appropriate material, applying the correct thickness across walls, roof, and floor, and pairing it correctly with a properly sealed vapour barrier. The roof deserves particular attention given how much heat is lost through an under-insulated ceiling, and floor insulation, while sometimes overlooked, genuinely improves comfort and efficiency. Getting this stage right sets up everything that follows, since a well-insulated sauna heats faster, runs more efficiently, and holds up better over time than one where insulation was treated as an afterthought.